Restoring Emergency Recovery Files
🔍 Restoring Emergency Recovery Files
If you lost all of your data and needed to do an emergency recovery with multiple users and a lot of files, this is where you wanna be.
Once we have download and transferred the files to you, you will need to go through a few steps to get everything back.
📊 Step-by-Step Guide
-
Step 1: Download and recreate users
Use this when you need to make sure your software is current and that all users exist before restoring returns.
You need to download the software and make sure that it is up to date by checking program updates and module updates.
Once you do that you want to go ahead and create all of the same users inside of the software.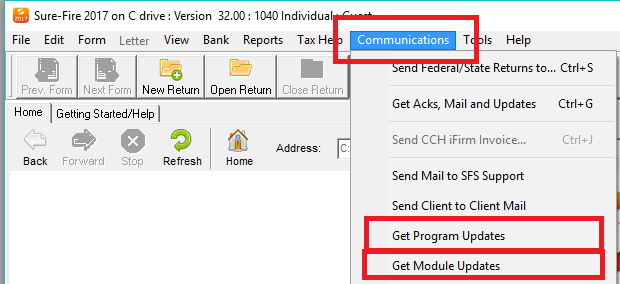
-
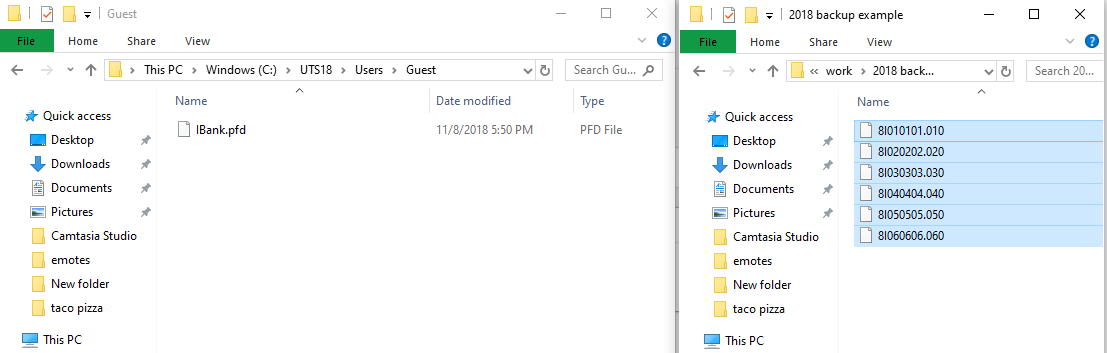
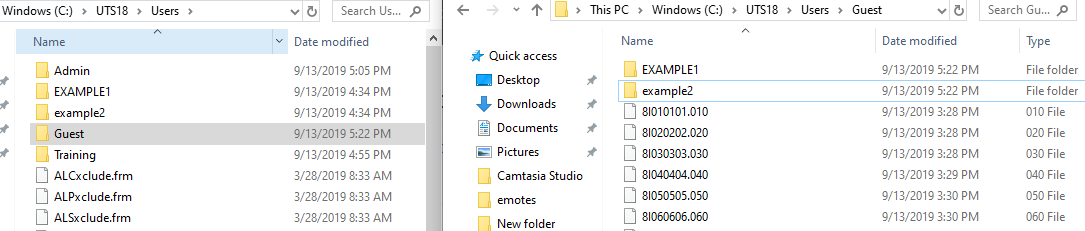
Step 2: Move returns into the [Guest] folder
Use this when you need to stage the recovered return files so the database can be populated.
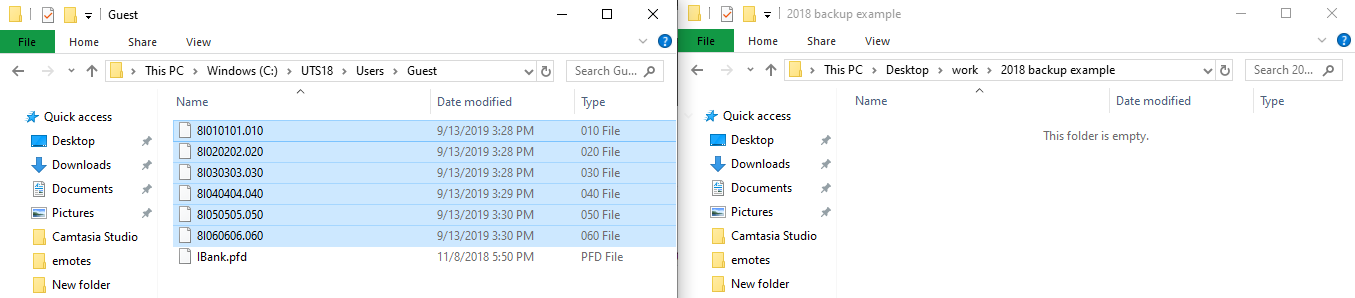
Now you will close the program and take the folder with the returns in it and put them into the [Guest] folder.
-
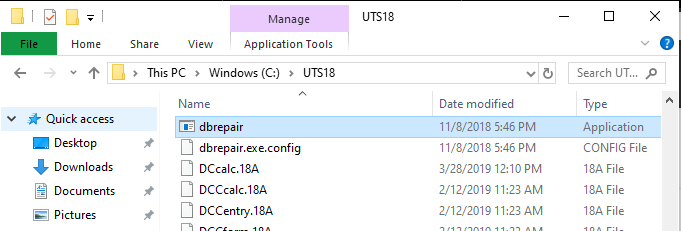
Step 3: Open dbrepair from the UTSXX folder
Use this when you need to populate the database from the staged returns.
Once you have copied the returns you want to back out to the UTSXX folder. Once here you want to find the dbrepair file.
-
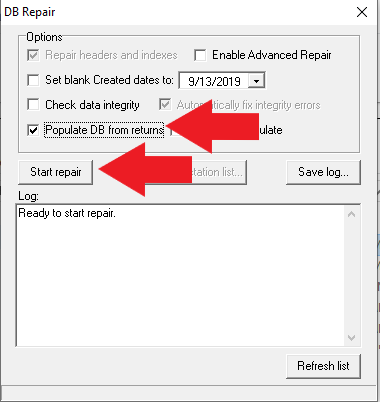
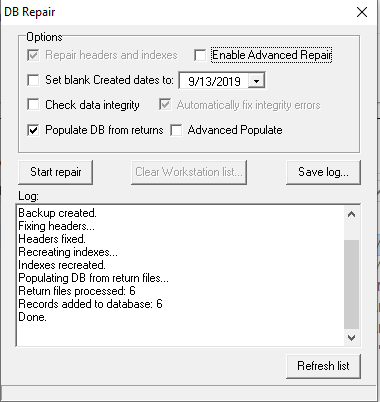
Step 4: Populate DB from returns
Use this when you need to rebuild/populate the database using the recovered return files.
Once you open the dbrepair you want to check the box for populate DB from returns and then hit start. After this process is complete it will say done and you just want to close this window.
-
Step 5: Log in as Admin (do not open files)
Use this when you need to identify which user created each return so you can place files correctly.
Now you will reopen the program and log in under the Admin. MAKE SURE NOT TO OPEN ANY FILES. On the return list, it will show what user created the file and the name of the file. For this example, I moved the file name and user name columns to
the left of the return list.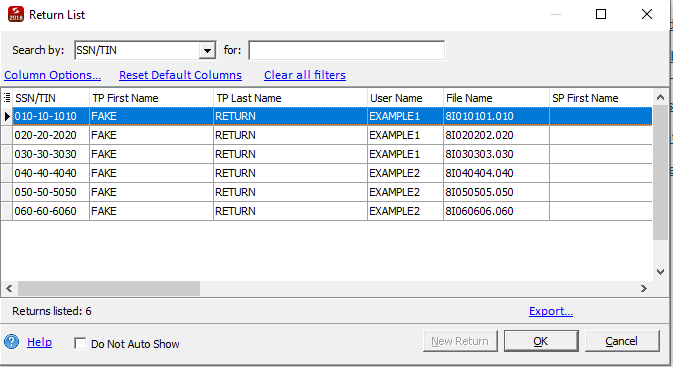
-
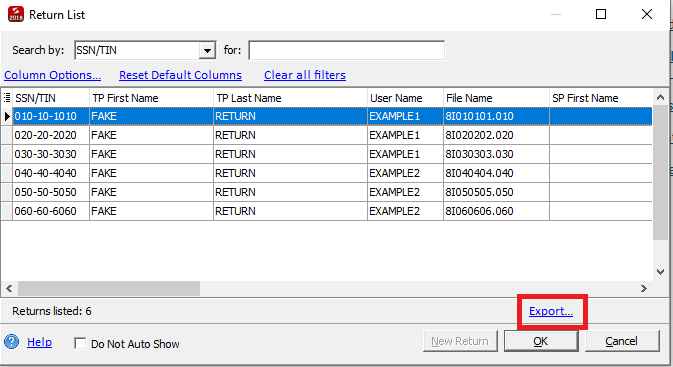
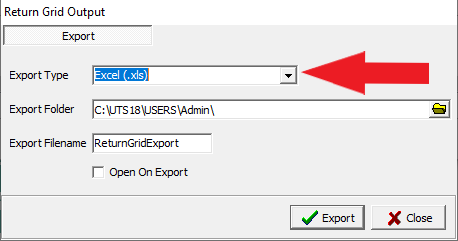
Step 6: Export the return list to Excel
Use this when you need an easy reference for recoveries that have a lot of returns.
Now we want to export the list so that we can easily sore the information. This is especially useful for recoveries that have a lot of returns. Make sure to select the excel spreadsheet before exporting. Then hit the export box by the green checkmark.
-
Step 7: Open ReturnGridExplorer from the Admin folder
Use this when you need to view the exported return grid information.
When you export the file it will save it into the Admin folder. Go into the admin folder and file the file marked ReturnGridExplorer
and open that file.
-
Step 8: Add matching user folders into the Guest folder
Use this when you need to prepare the Guest folder with the correct user folder names.
During the next step, we recommend adding new folders into the guest folder that has the same names as the users you had to create in the software.
-
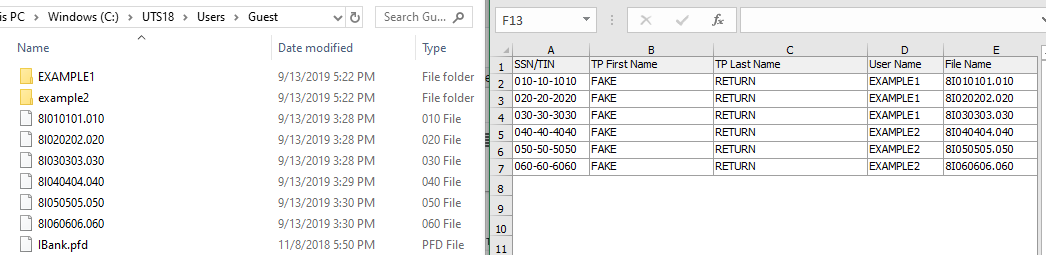
Step 9: Use the Excel spreadsheet to locate each file
Use this when you need to map each return to the correct user folder.
Now that you have added those folders into the guest folder, you want to open the other window that has the excel spreadsheet and reference that information to know which file needs to be located in the specific user folder.
-
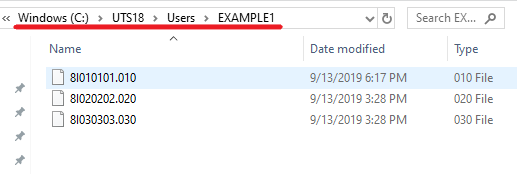
Step 10: Move each file into the correct user folder
Use this when you need to separate the recovered files into the correct user folders.
From here you want to take all of those files you have separated and put them in the actual user folder under the corresponding user.
-
Step 11: Reopen the program and open the files
Use this when you’re ready to verify that each return opens correctly under the right user.
Once you have moved each file into the corresponding folder you can reopen the program and open the files.
- NOTE - If you go to open the file and its blank, that means you didn't put the return under the correct username that created the return!
📞 Still Need Help?
If you are having trouble, contact our support team:
Phone: 1-800-516-9442
Tags: install,setup