Windows 10 Network Install
📚 What This Guide Covers
This guide walks you through setting up Sure-Fire Tax Software on a network with multiple computers:
- Main Server Setup - Configure the primary computer that stores all files
- Network Sharing - Share the main drive securely across your office network
- Workstation Installation - Connect other computers to access the shared data
⚠️ Before You Begin
You will need:
- Main Computer - Dedicated machine to host tax software and data
- Ethernet Cables - All computers must be wired (not wireless)
- Local Network - All computers on the same office network
- Administrator Access - Permission to modify drive sharing settings
🖥️ Setting Up the Main Computer
Step 1: Install Software on Main Computer
Install Sure-Fire Tax Software to the primary computer. This will be the "Server" or "Data Computer" that all other machines connect to.
Step 2: Open File Explorer
Once the software is installed:
- Click the File Explorer icon on the taskbar (or press Windows key + E)
- Look for the folder icon on the bottom left next to the Windows Start button

Step 3: Navigate to Your Local Drives
In File Explorer:
- Click This PC on the left sidebar
- You should now see all your local drives (C:, D:, etc.)

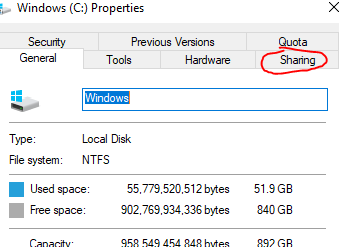
Step 4: Access C: Drive Properties
Now we need to share the C: drive with your network:
- Right-click on the C: Drive
- Select Properties from the menu

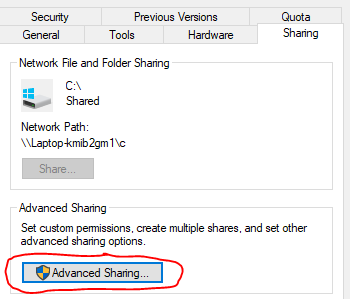
Step 5: Enable Sharing on the Drive
In the Properties window:
- Click the Sharing tab at the top
- Click Advanced Sharing button
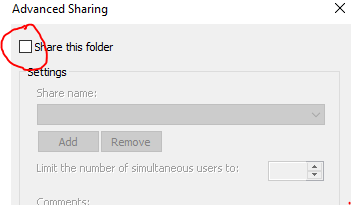
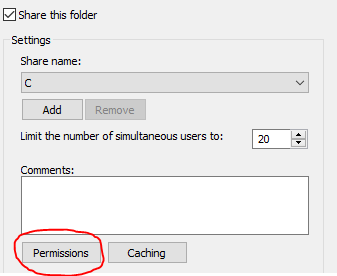
Step 6: Configure Folder Sharing
In the Advanced Sharing dialog:
- Check the box that says Share this folder
- Click the Permissions button
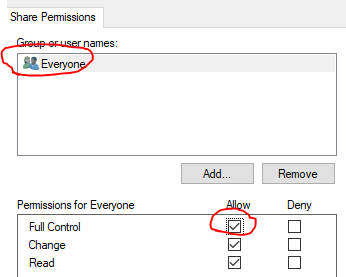
Step 7: Set Full Control Permissions
In the Permissions window:
- Find the user Everyone (should be listed by default)
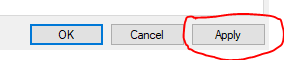
- Check the Full Control checkbox
- Click Apply / OK
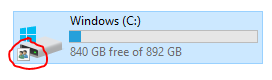
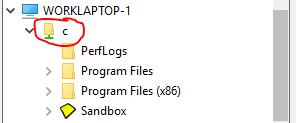
Step 8: Verify Sharing is Active
After clicking OK on all dialogs:
- Go back to File Explorer and look at your C: Drive
- You should now see a small hand icon on the C: Drive, indicating it's being shared across the network
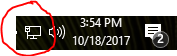
Step 9: Ensure Wired Network Connection
IMPORTANT: Wireless networks do not work for this setup. All computers must use Ethernet cables.
- Check that your main computer is connected via Ethernet cable (wired)
- Do not use WiFi for the server or workstations

💻 Installing on Workstations
Step 1: Open File Explorer on Workstation
On each computer you want to connect to the main server:
- Open File Explorer
- Click This PC on the left
- You should see your C: drive and other local drives

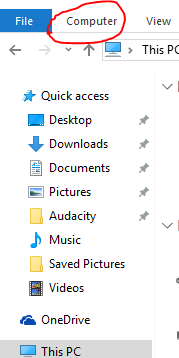
Step 2: Access the Computer Menu
In the File Explorer ribbon (top menu):
- Click the Computer button in the top left area
- This will show you network options
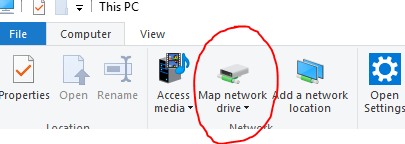
Step 3: Map a Network Drive
You should now see the option Map a Network Drive:
- Click Map a Network Drive
- A dialog window will open
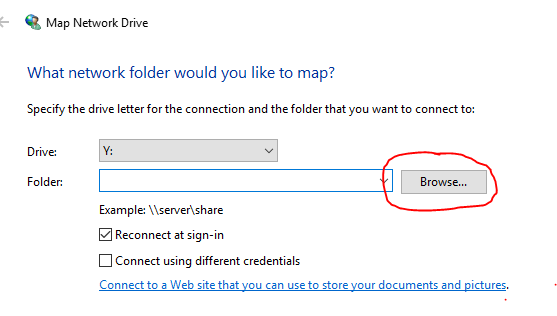
Step 4: Browse to Main Computer
In the Map a Network Drive dialog:
- Click the Browse button
- A file browser window will open
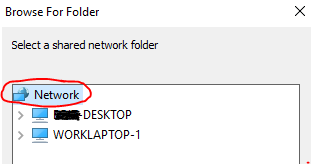
Step 5: Find the Main Computer
In the browser window:
- Double-click Network to see all computers on your network
- Look for your Main computer in the list
💡 Don't Know the Main Computer Name?
Go to your Main Computer and find the Device Name:
- Right-click the Windows icon (bottom left) and select System
- The Device Name will be listed in the window
- Use that name when searching the network
Step 6: Select the C: Drive
Once you find the Main Computer:
- Click the arrow next to the computer name to expand it
- You should see the shared drives including C
- Click on the C folder to select it
- Click OK

💡 Can't See the Main Computer?
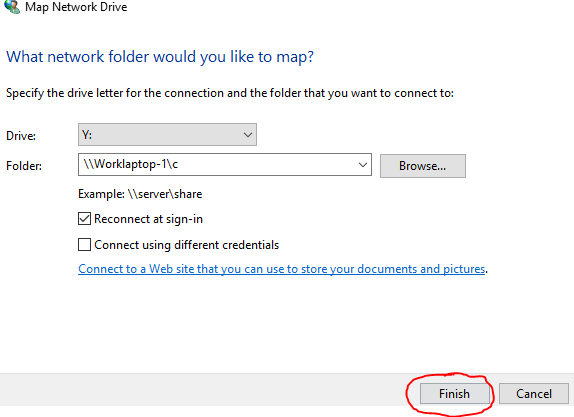
You can manually type the path in the "Folder" field on the Map Network Drive screen:
\\[ComputerName]\c
Example: If the main computer is named "Worklaptop-1", type: \\Worklaptop-1\c
Step 7: Complete Network Drive Mapping
Back in the Map a Network Drive dialog:
- Click Finish
- A new window will open showing the shared C: drive from the main computer
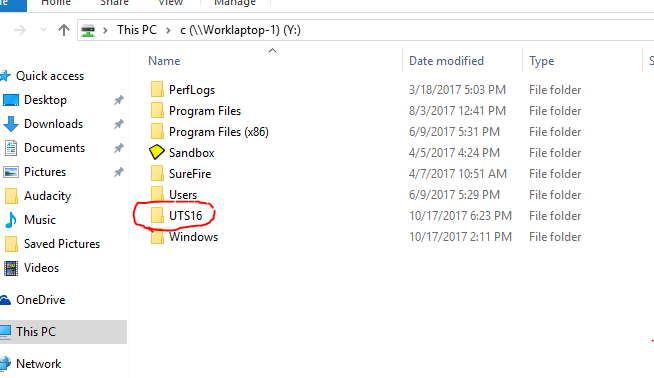
Step 8: Find the Software Installation Folder
In the folder window that opened:
- Look for the UTSXX folder (where XX is the last 2 digits of the tax year)
- Examples: UTS24 (2024), UTS23 (2023), UTS22 (2022)
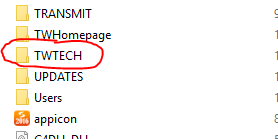
Step 9: Open TWTECH Folder
Now navigate to the setup files:
- Double-click to open the UTSXX folder
- Find and open the TWTECH folder inside
Step 10: Run Workstation Setup
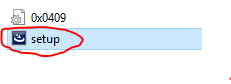
In the TWTECH folder:
- Find the file setup.exe
- Double-click it to start the installation
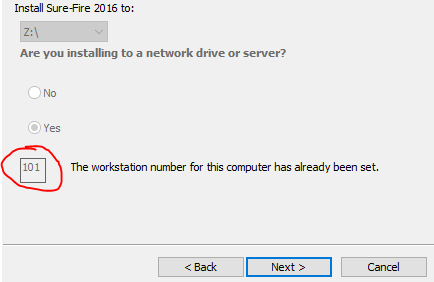
Step 11: Enter Workstation Number
The setup wizard will ask for a Workstation Number:
- Each workstation must have a unique number
- Make sure no two workstations share the same number
- Examples: First workstation = 102, Second = 103, Third = 104
Step 12: Completion and Desktop Icon
After the installation completes:
- Look for the new Sure-Fire Tax Software icon on your desktop
- You can now use this workstation to access the shared data

Step 13: Optional - Save Workstation Defaults
When you first open the software on a workstation, you may see a Setup Options dialog:
- Fill out the setup information (office details, etc.)
- Check the box that says "Save for Workstation Defaults"
- This prevents you from entering the same information on every workstation
❌ Troubleshooting
Main Computer not appearing in Network list
This means your internal network isn't properly configured. Try these steps:
- Verify all computers are using Ethernet cables (not WiFi)
- Check that both computers are on the same network
- Manually type the path using the Device Name (see Step 6 tip)
- If issues persist, call our technical support team for network troubleshooting
Workstations cannot access shared files
Make sure the Main Computer's C: drive permissions are set correctly:
- Go back to the main computer and check "Share this folder" is enabled
- Verify "Everyone" has "Full Control" permissions
- Ensure the computer isn't in sleep mode when workstations try to connect
Setup.exe won't run from network
Try running as Administrator:
- Right-click setup.exe
- Select "Run as Administrator"
- Follow the prompts to complete installation
📞 Still Need Help?
If you are having trouble with network setup, contact our support team:
Phone: 1-800-516-9442
Tags: install,setup